How to use My Local POS
From installing the app to your first sale and your first backup. Each step takes a few minutes.
1. Install on Windows
- Go to the Download page and click Windows installer (.msi).
- Open the downloaded file. If you see "Windows protected your PC", click More info then Run anyway.
- Follow the installer. It installs for your Windows user only, so no administrator password is needed.
- Open My Local POS from the desktop shortcut or the Start menu.
%APPDATA%\My Local POS. It is kept when you update or uninstall the app.
2. Install on Android
- Open the Download page on your phone and tap Android app (.apk).
- When the download finishes, tap the file to open it.
- If asked, allow your browser or Files app to install unknown apps, then go back and tap Install.
- Open My Local POS from your home screen.
3. Set up your store
The first time you open the app, you'll see the welcome screen.
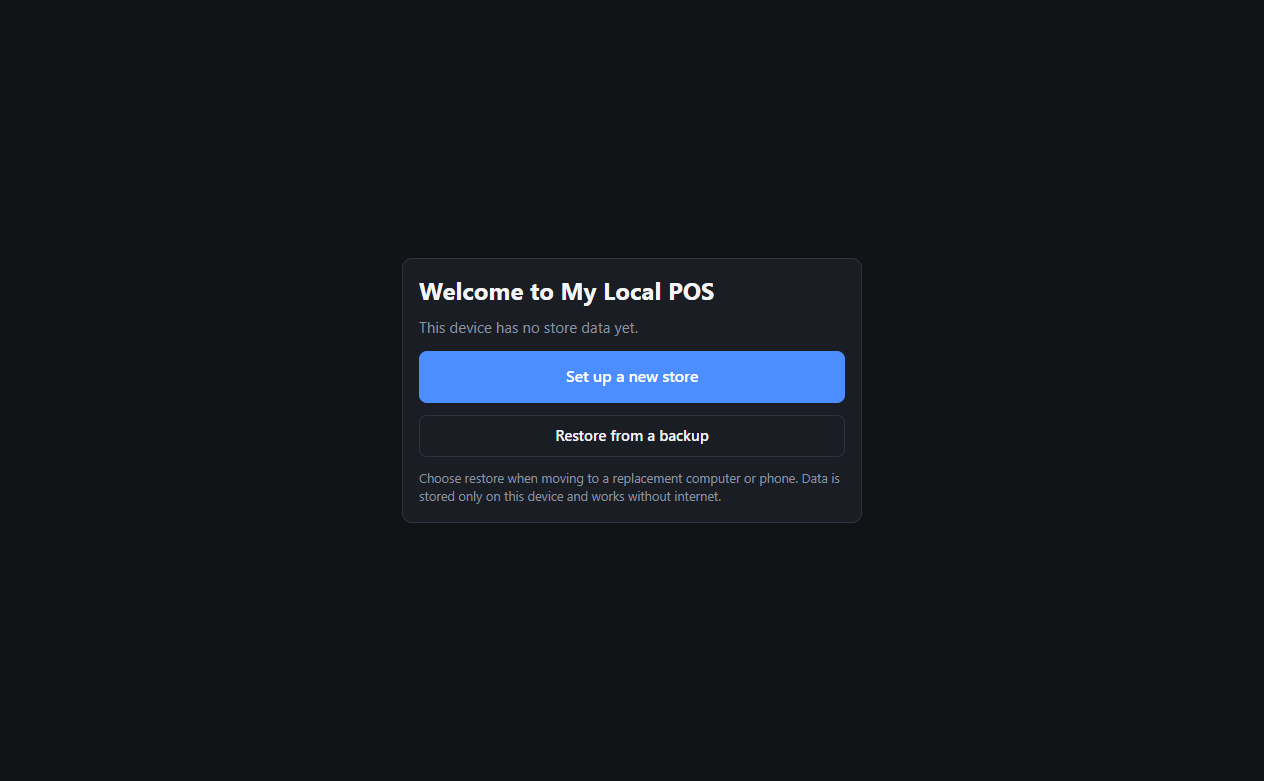
- Tap Set up a new store. (Choose Restore from a backup only when moving from another device.)
- Enter your store name and check the time zone (Asia/Manila by default).
- Choose whether a proof photo is required for every GCash and bank transfer sale.
- Choose when the screen should lock after no one has used it (5 to 60 minutes, or never).
- Create the admin account (the owner) and the cashier account. Passwords need at least 8 characters.
- Tap Create store.
4. Add products
- Log in as admin and open Products.
- Tap + Add product.
- Fill in the SKU (your own short product code, for example
RICE-1KG), name and price. - Optional: category, barcode, unit cost and a low-stock alert level.
- Enter the opening stock, meaning how many you have right now, and save.
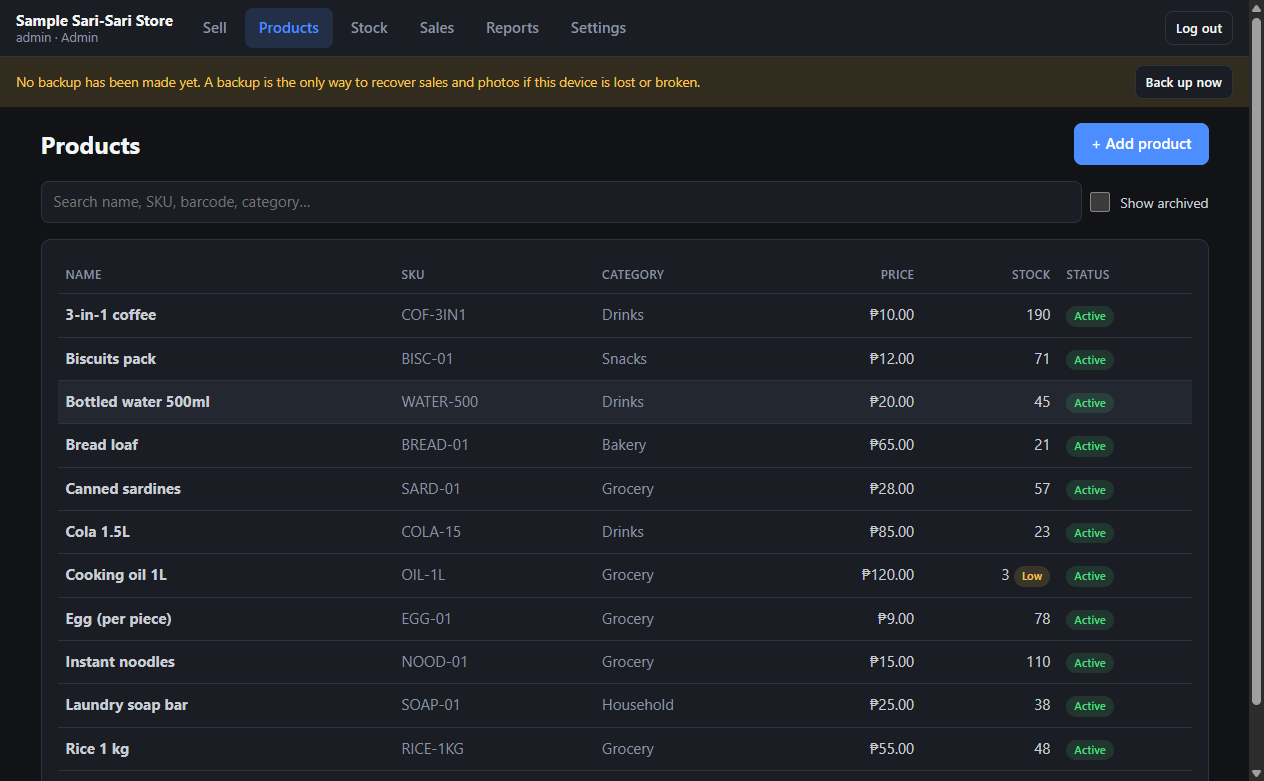
Stopped selling something? Edit it and make it inactive (archive). It disappears from the Sell screen, and old sales keep their history.
5. Add or correct stock
Use Stock whenever items arrive or the count is wrong. Don't edit the number directly. Every change is recorded.
- Open Stock and choose the product.
- Pick the type of change:
- Stock received: a delivery or new items.
- Remove: damaged, lost or expired items, or the count is too high. A reason is required.
- Add: the count is too low after checking your shelves. A reason is required.
- Enter the quantity and tap Save stock change.
The history below the form shows every change: sales, deliveries and corrections, with who did it and when.
6. Make a sale
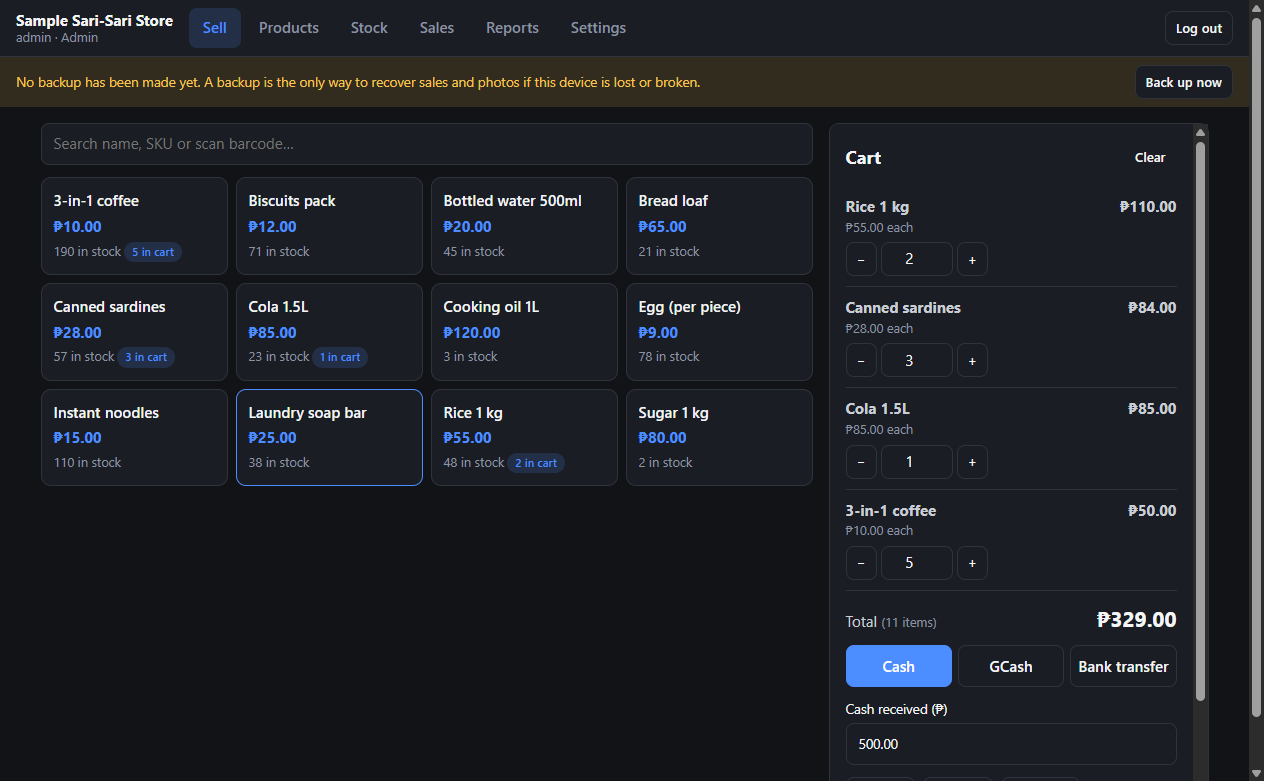
- Open Sell. Tap products to add them to the cart, or search by name, SKU or barcode.
- Use − and + to change quantities. The total updates automatically.
- Choose the payment method:
- Cash: type the amount the customer gave, or tap a quick amount. The app shows the change.
- GCash or Bank transfer: first check on your own phone or bank app that the money arrived. Then enter the reference number, attach a photo of the receipt if you want (or if your store requires it), and tick the box confirming you received it.
- Tap Complete sale. Stock is deducted and the cart clears.
7. Sales and reversals
Open Sales to see every sale for a date range. Tap a sale to see its items, payment details and proof photo. Cashiers see only their own sales under My sales.
Reversing a sale (admin only)
- Open the sale and tap Reverse this sale…
- Enter the reason, choose how the money was returned, and whether the items go back into stock.
- Tap Confirm reversal.
The original sale stays in the history, marked as reversed. A sale can only be reversed once. Refunds through GCash or a bank must be done by you outside the app.
8. Reports
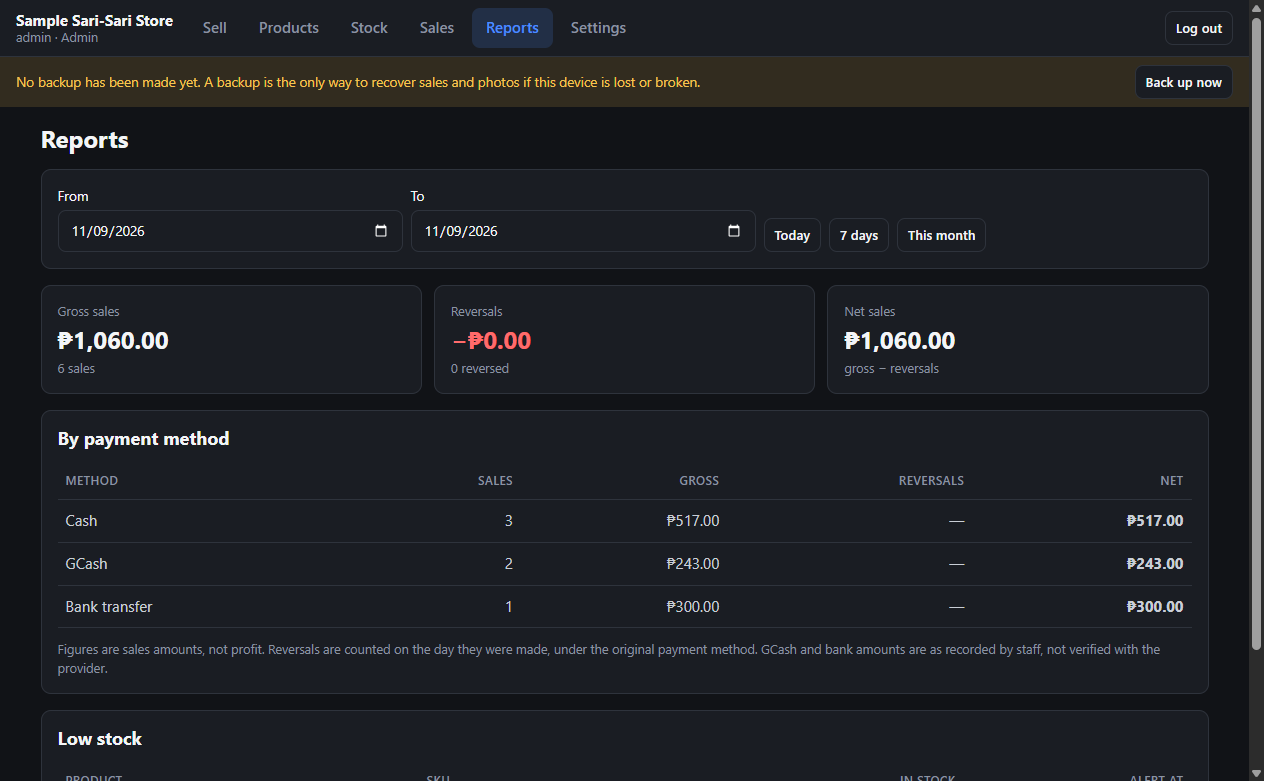
- Pick Today, 7 days, This month, or any dates.
- Gross sales = all completed sales. Reversals = sales you undid. Net sales = gross minus reversals.
- By payment method helps you match your cash drawer, GCash and bank balances.
- Low stock lists products at or below their alert level.
These are sales amounts, not profit.
9. Accounts and passwords
- Change your password: Settings (admin) or Account (cashier) → Change my password.
- Cashier forgot their password: the admin goes to Settings → Accounts → Reset cashier password.
- Admin forgot the password: on the login screen tap Forgot the admin password? and enter your recovery code. You'll get a new recovery code. Write it down again.
- Lost the recovery code? While logged in as admin, go to Settings → Admin recovery code and create a new one.
- Always Log out when you leave the counter. The screen also locks by itself after the time you chose.
10. Backups (very important)
Your data exists only on your device. If the device is lost, stolen, broken, or the app is uninstalled, a backup is the only way to get your data back.
Export a backup
- Log in as admin and open Settings.
- Under Backup, tap Export backup now.
- On Windows, choose where to save the file. On Android, choose where to share or save it, such as Google Drive, email or Files.
- Keep a copy off the device, such as a USB drive, another computer, or cloud storage.
Restore a backup
- Go to Settings → Restore from backup (or choose Restore from a backup on the welcome screen of a new install).
- Choose the backup file and type RESTORE to confirm.
Restoring replaces all current data on this device with the backup. It does not merge them. The app checks the file first and keeps a safety copy of the current data.
11. Updating the app
- Export a backup.
- Download the new version from the Download page.
- Install it over the old version. Don't uninstall first, especially on Android.
- Open the app and check that your products and sales are still there.
12. Moving to a new device
- On the old device, export a backup and copy the file to the new device.
- Install My Local POS on the new device.
- On the welcome screen, choose Restore from a backup and select the file.
- Log in with your usual accounts.
Two devices don't share data. If you keep using both, each one has its own separate records.
13. Troubleshooting
Windows blocks the installer
Click More info → Run anyway. If there is no "Run anyway" button, Smart App Control may be on, and it blocks unsigned apps.
Android says "App not installed"
Make sure you have enough free storage and that you allowed installing unknown apps. If an older copy came from somewhere other than this website, it may be signed differently. Export a backup, uninstall it, install from here, then restore.
"Too many failed attempts" on login
Wait for the number of seconds shown, then try again with the correct password.
A backup is rejected
The file may be damaged, incomplete, or made by a newer version of the app. Try another backup copy, or update the app first.
Still stuck?
Check the FAQ or email matmat.ando@gmail.com. Help is given when I can, with no guarantee.